Witch Finger Cookies
How to make the best Witch Finger Cookies for this Halloween? Easy, spooky, and fun recipe perfect for parties, kids, and creepy treats. These cookies simply melt in your mouth! I'm sure you carefully plan your Halloween menu each year and pay attention to every detail.
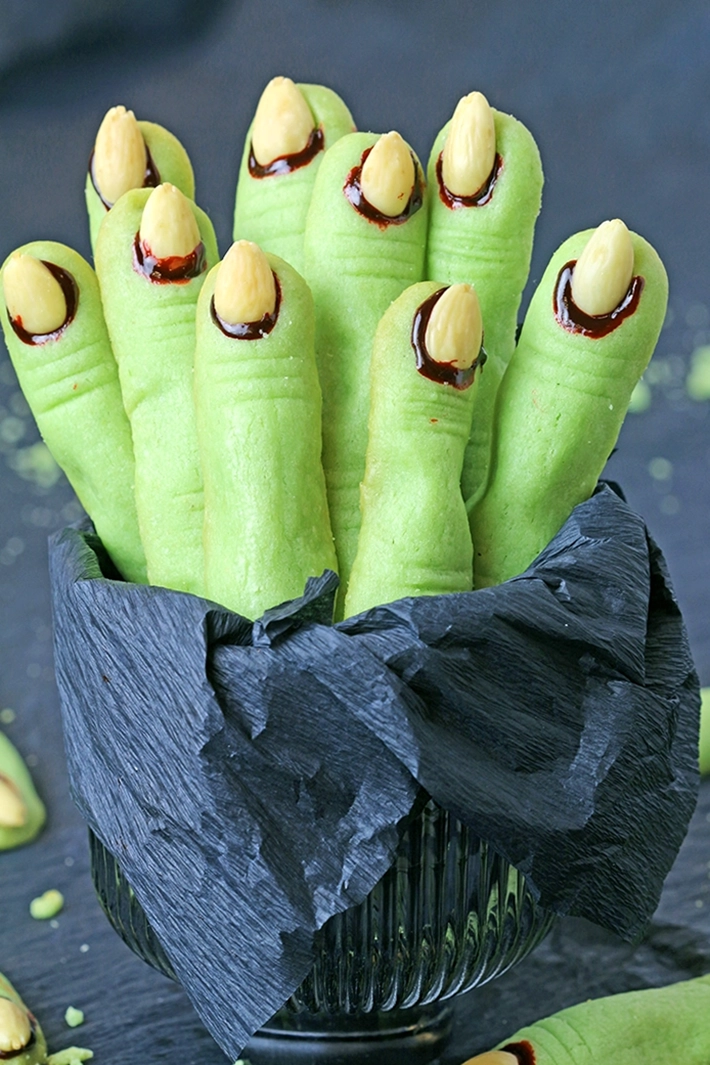
These Witch Finger Cookies perfectly match scary Halloween snack tables. If you make them now, they'll surely be part of your party menu. Only a few simple ingredients are needed to prepare them, and the process is fun - kids can even join in to help.

Ingredients for Witch Finger Cookies:
- 1 cup unsalted butter
- 1 cup powdered sugar
- ⅓ cup granulates sugar
- 1 large egg
- 1 teaspoon almond extract
- 1 teaspoon vanilla extract
- 2 3/;4 cups all purpose flour
- ¾ teaspoon salt
- 1 teaspoon baking powder
- 30 whole blanched almonds
- green food coloring
- red decorate gel
Step-by-Step Instructions to Make Witch Finger Cookies:
Make the Dough
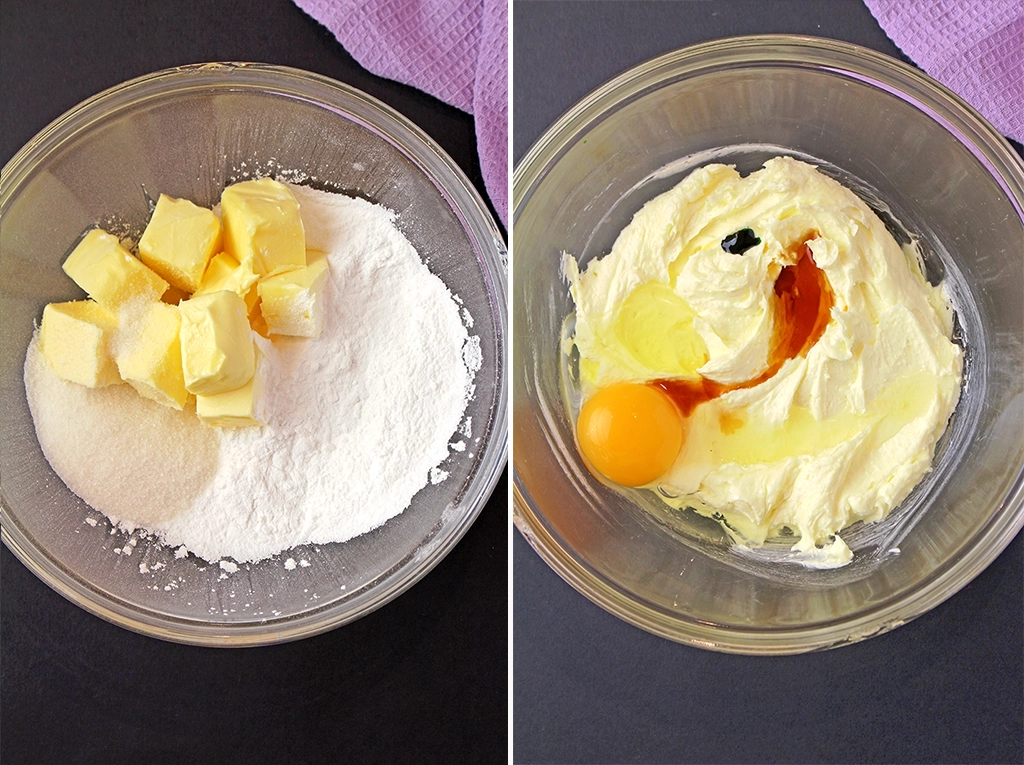
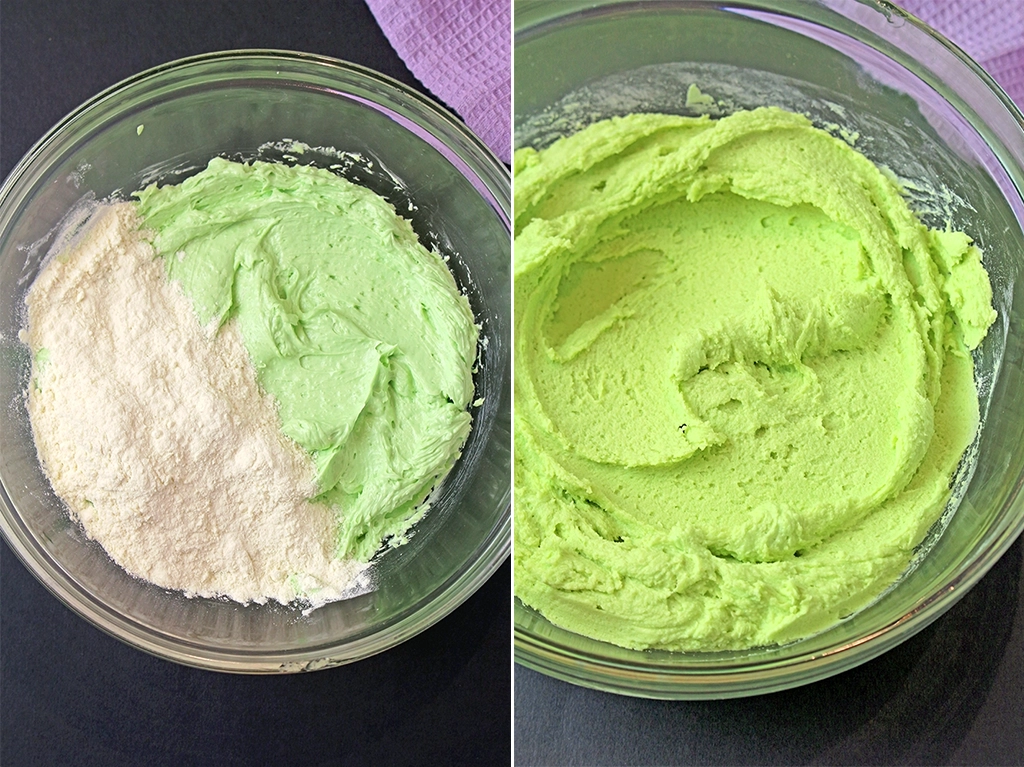
In a bowl, combine the sifted flour, baking powder, and salt. Set aside. Beat the softened butter, powdered sugar, and granulated sugar until light and fluffy. Add the egg, almond extract, vanilla extract, and green food coloring, and beat until combined. Scrape down the sides of the bowl, add the dry ingredients, and mix until incorporated. Cover the bowl with plastic wrap and chill until firm, about 2 hours.
Shape the Cookies
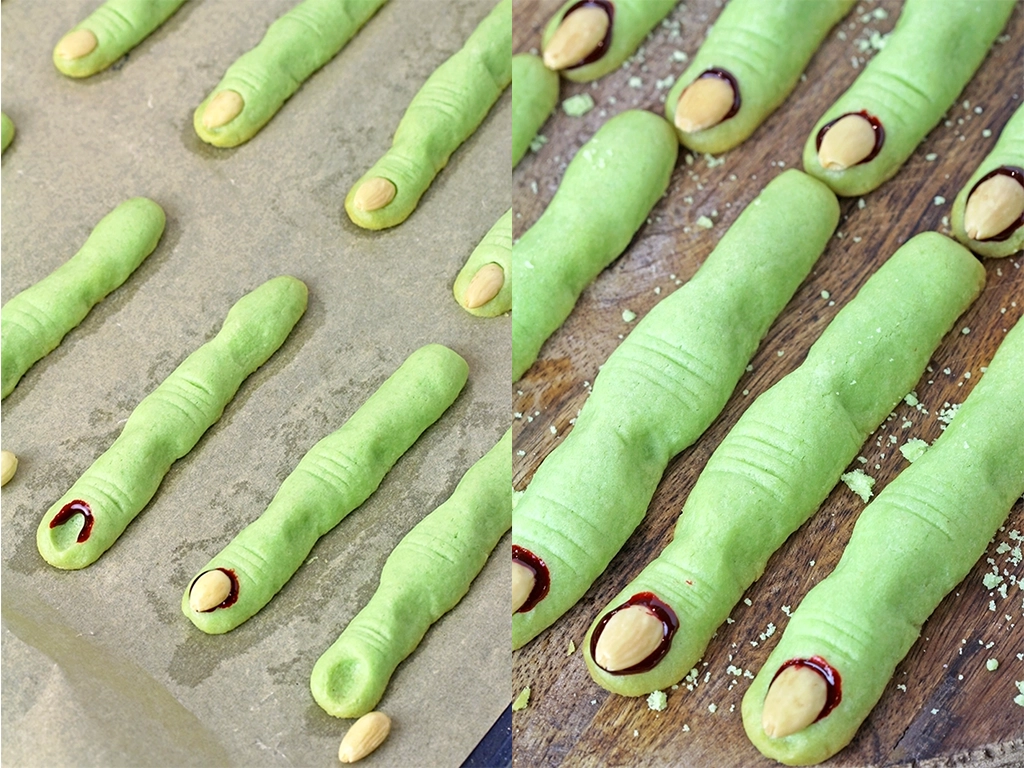
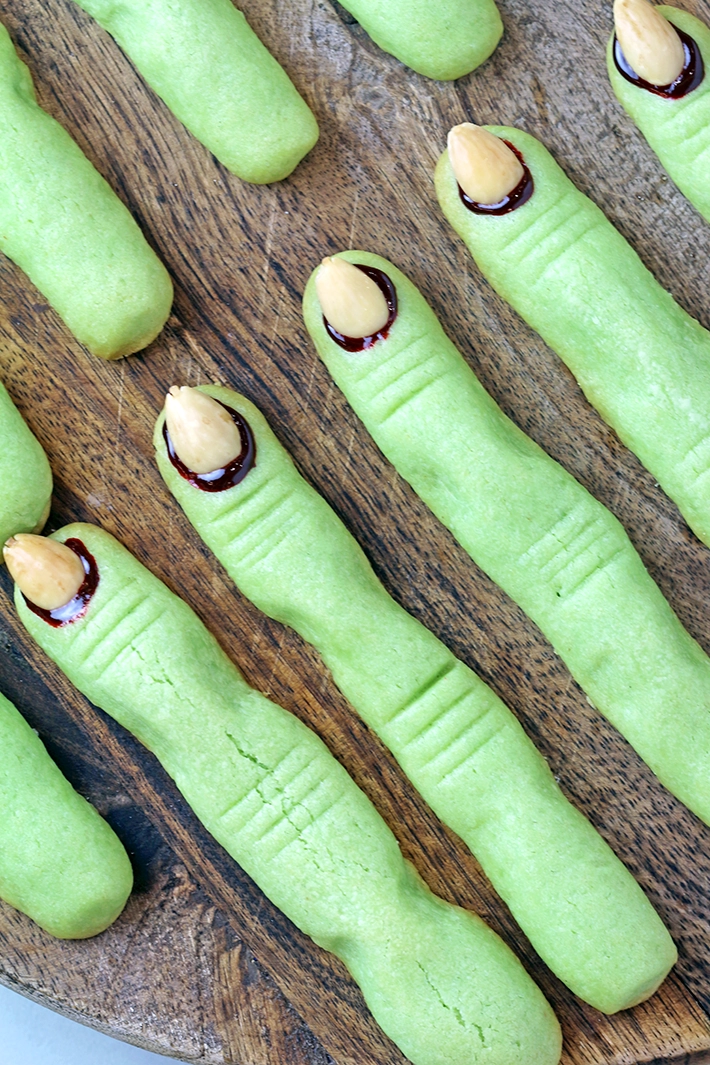
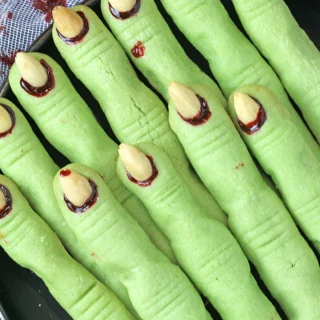
Remove a portion of the dough from the refrigerator, keeping the rest chilled. Scoop about 1 tablespoon of dough and roll it into a thin log. Press an almond onto one end to form a fingernail. Use a small knife to score lines below the nail and across the middle to create the look of knuckles. Gently pinch the dough between the knuckles to give the cookie a more realistic finger shape.

Baking
Bake at 325°F (163°C) for about 15 minutes, or until the bottoms are lightly golden. Once the cookies have cooled slightly and firmed up, remove the almond, add a small amount of red gel food coloring around the nail bed, and then press the almond back into place.
Tips for Perfectly Spooky Witch Finger Cookies:
- Bake 2-3 test cookies first. If they spread too much while baking, follow these tips to make them perfect:
- Shape the fingers thinner, as the dough will spread in the oven.
- Add 1 tablespoon of flour at a time, until the dough no longer sticks to your hands. Be careful not to add too much, or the cookies may turn out dry.
- The dough should be cold and firm. If needed, chill for longer than 2 hours - overnight is best. Work in batches.
- If the shaped fingers feel too soft, return them to the refrigerator to firm up before baking.
- Be careful not to over-bake, as they will lose their lovely green color. At the same time, make sure they are baked - undercooked cookies will crumble. Bake until the bottoms are lightly golden; they may still feel slightly soft but will firm up as they cool.
- If you're not satisfied with their appearance, you can adjust the shape immediately after removing them from the oven while they are still warm and soft. Gently pinch the sides between the knuckles to raise them slightly if they have flattened.

Storage
Store baked and cooled cookies in an airtight container at room temperature for up to 1 week.
Freezing
Baked and cooled cookies can be frozen for up to 3 months. Place them in a freezer-safe container with parchment paper between the layers.
Can the dough be made in advance?
Yes, the dough can be prepared in advance. Keep it covered tightly with plastic wrap in the refrigerator for up to 2 days.

More Halloween Recipes
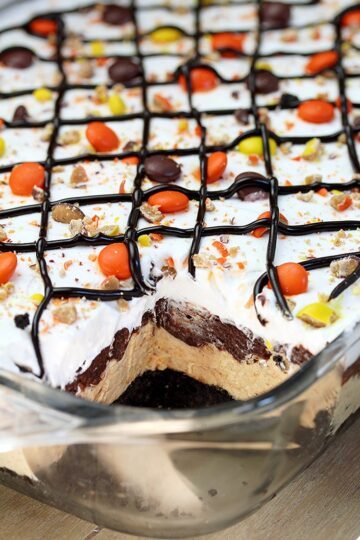
Looking for more fun ideas for Halloween? This Reese's Pieces Peanut Butter Chocolate Lasagna is pure perfection - delicious and easy to decorate as you like. If you enjoy making festive treats, M&M's Pumpkin Pretzel Bark is a great choice. For savory bites, try these Pepperoni Pizza Pumpkins from the well-known blog OMG Chocolate Desserts - they look amazing and are perfect for Halloween.
Witch Finger Cookies
Ingredients
- 1 cup unsalted butter
- 1 cup powdered sugar
- ⅓ cup granulates sugar
- 1 large egg
- 1 teaspoon almond extract
- 1 teaspoon vanilla extract
- 2 3/ ;4 cups all purpose flour
- ¾ teaspoon salt
- 1 teaspoon baking powder
- 30 whole blanched almonds
- green food coloring
- red decorate gel
Instructions
Make the Dough
- In a medium bowl, whisk together the sifted flour, baking powder, and salt. Set aside.
- In a separate large bowl, beat the softened butter, powdered sugar, and granulated sugar with an electric mixer on medium-high speed until fluffy.
- Add the egg, almond extract, vanilla extract, and a few drops of green food coloring, and beat until combined.
- Scrape down the sides of the bowl, add the dry ingredients, and mix on low speed until just combined. If the color isn’t green enough, add a few more drops of food coloring until you reach the desired shade.
- Wrap the bowl and chill until firm, for about 2 hours, or overnight for best results.
Shape the Cookies
- Preheat the oven to 325°F (163°C). Line a baking sheet with parchment paper or a silicone mat.
- Remove a portion of the dough from the refrigerator, keeping the rest chilled.
- Scoop about 1 tablespoon of dough and roll it into a thin log to resemble a finger. Press an almond onto one end to form a fingernail.
- Using a small knife, score lines just below the nail and across the middle to create knuckles. Finally, gently pinch the dough between the knuckles to get the finger-like look. (see reference photo).
- Work in batches to prevent the dough from becoming too soft.
Baking
- Bake for about 15 minutes, or until the bottoms are lightly golden.
- Once the cookies have cooled slightly and firmed up, remove the almond, add a small amount of red gel food coloring around the nail bed, and then press the almond back into place.
Notes
- Bake 2–3 test cookies first. If they spread too much while baking, follow these tips to make them perfect:
- Shape the fingers thinner, as the dough will spread in the oven. Add 1 tablespoon of flour at a time, until the dough no longer sticks to your hands. Be careful not to add too much, or the cookies may turn out dry.
- The dough should be cold and firm. If needed, chill for longer than 2 hours - overnight is best. Work in batches.
- If the shaped fingers feel too soft, return them to the refrigerator to firm up before baking.